The following instructions are mainly for installing a Raspbian image file that already has node-red and everything installed to work with a Temco product with a Raspberry Pi Compute Module installed. These instructions could also be used to install on a standard Raspberry Pi 3/4 - lower models are not recommended as the Node-red Home Automation GUI is a rather large flow.
The Raspberry Pi Compute Module Installation post already covers the process of flashing the image file. The last paragraph about enabling the SSH server can be ignored as it is already configured in the image file - I will be posting the actual image file very soon, just finishing up some final work on the Node-red flow.
After flashing the image file using an IO board, the Compute module can be inserted in the device it is to be used in - or the following steps can be done with it installed in the IO Board, but the jumper needs to be set to the ‘Boot enable’ mode. You will need a network connection - a USB>Ethernet adapter can be used with the IO Board - Temco products with a Compute Module will have an ethernet port available.
The first step would be to connect to the device using SSH from another computer - this can be done via Putty or any other SSH client. I use both WinSCP and Putty. WinSCP makes it easy to transfer files to/from the Raspbian system installed on the Compute Module, and Putty allows for command line access to the Raspbian OS. I find it better to run putty directly from WinSCP, after installing these two applications go to the preferences in WinSCP - click 'Tools > Preferences".
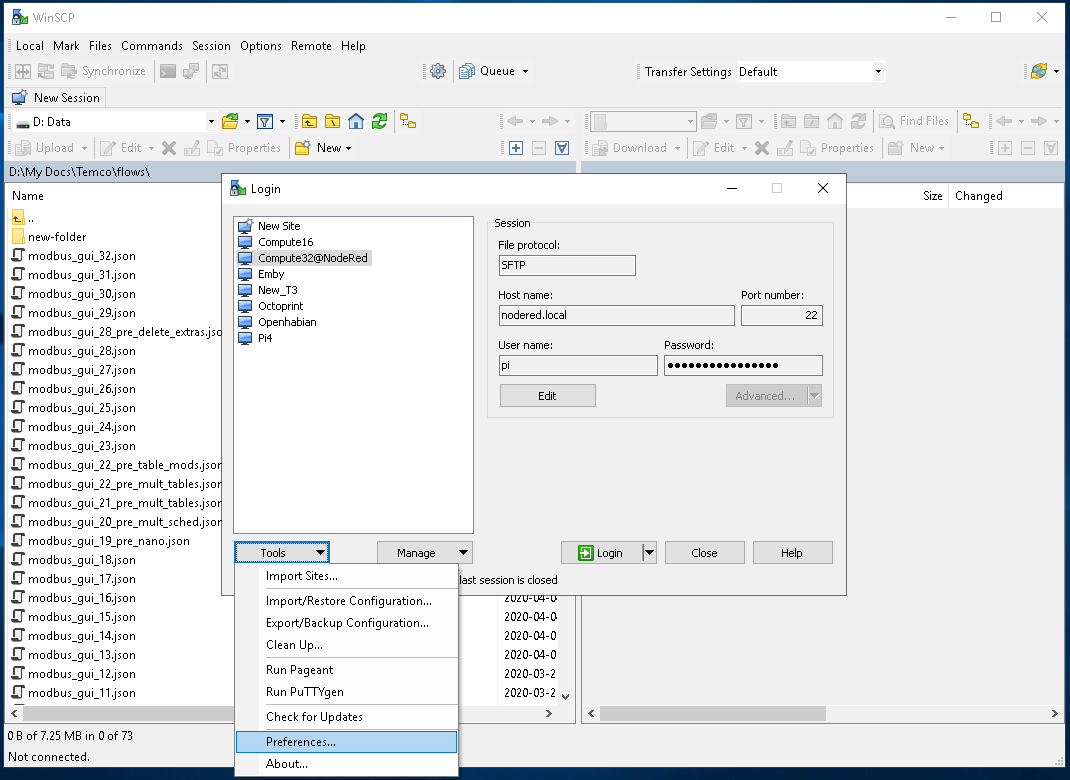
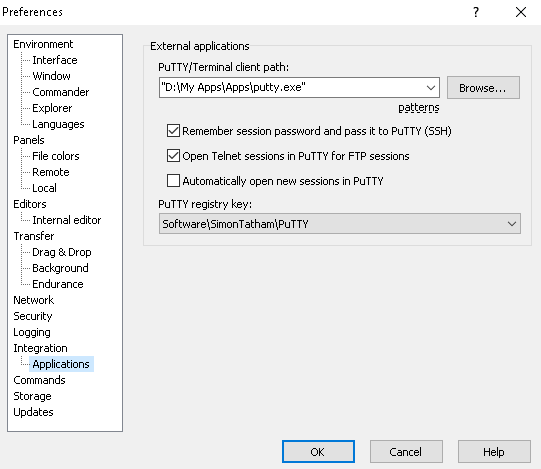
Then select ‘Integration > Applications’ - and click on the ‘Browse’ button to set the location of Putty so WinSCP can find it.
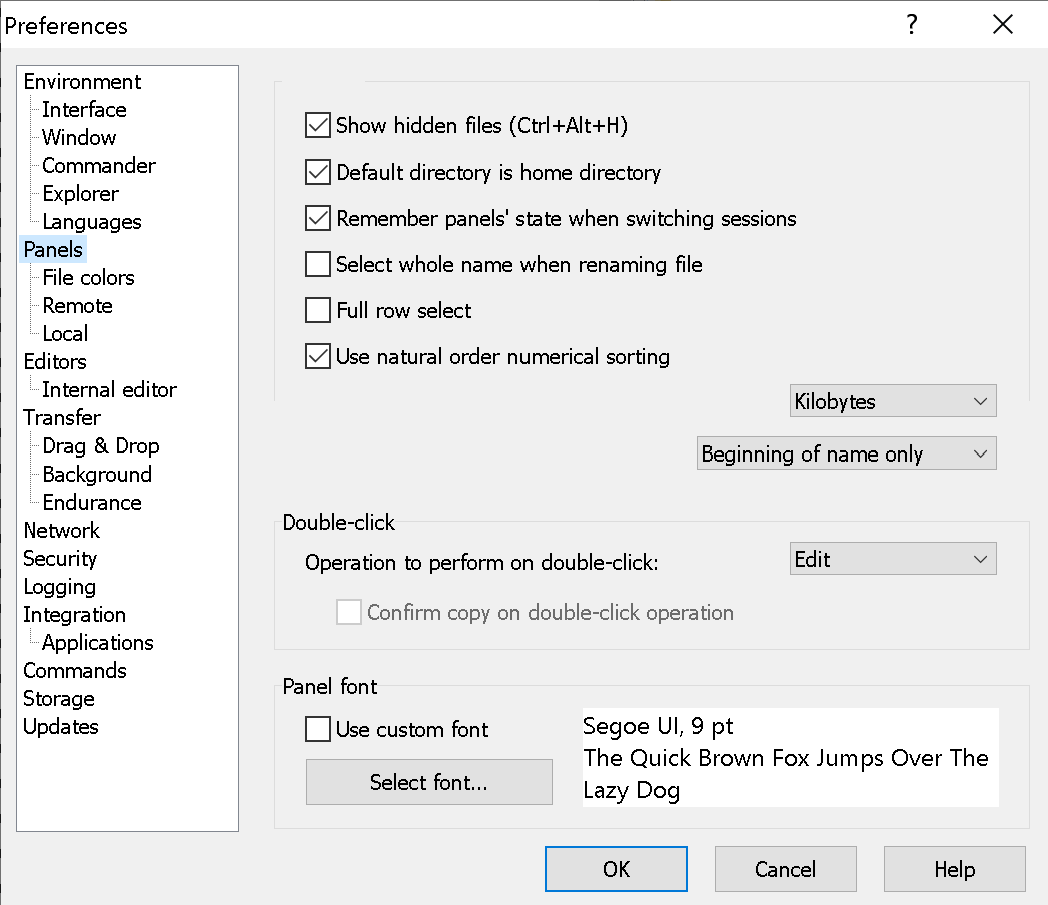
While in preferences another setting needs to be done - click on Panels, and make sure that ‘Show hidden files is selected’.
Close the Preferences after this is done and then select ‘New Site’ at the top of the list of Logins.
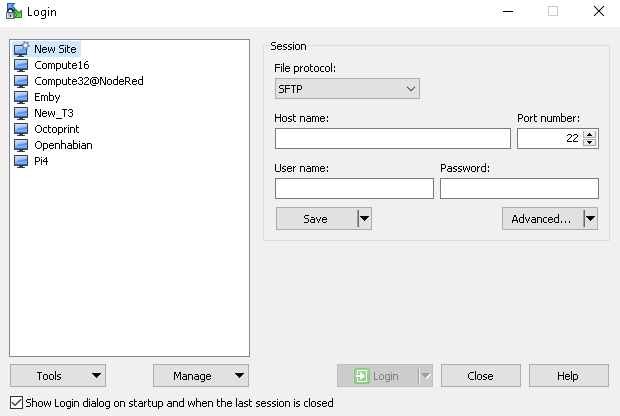
Enter nodered.local as the Host Name, leave Port number at 22, enter pi for username, and raspberry for the password - then click ‘Save’. The site name can be changed and you can choose whether or not to save the password so it does not need to be entered each time.
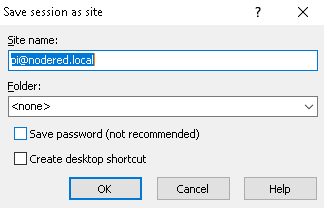
The Raspbian/Node-red image file has the host name ‘nodered.local’ configured so it’s not necessary to know the ip address. Then you can click on ‘Login’ and it should connect to the Compute Module, if ‘Save Password’ was not selected you may need to enter the password.
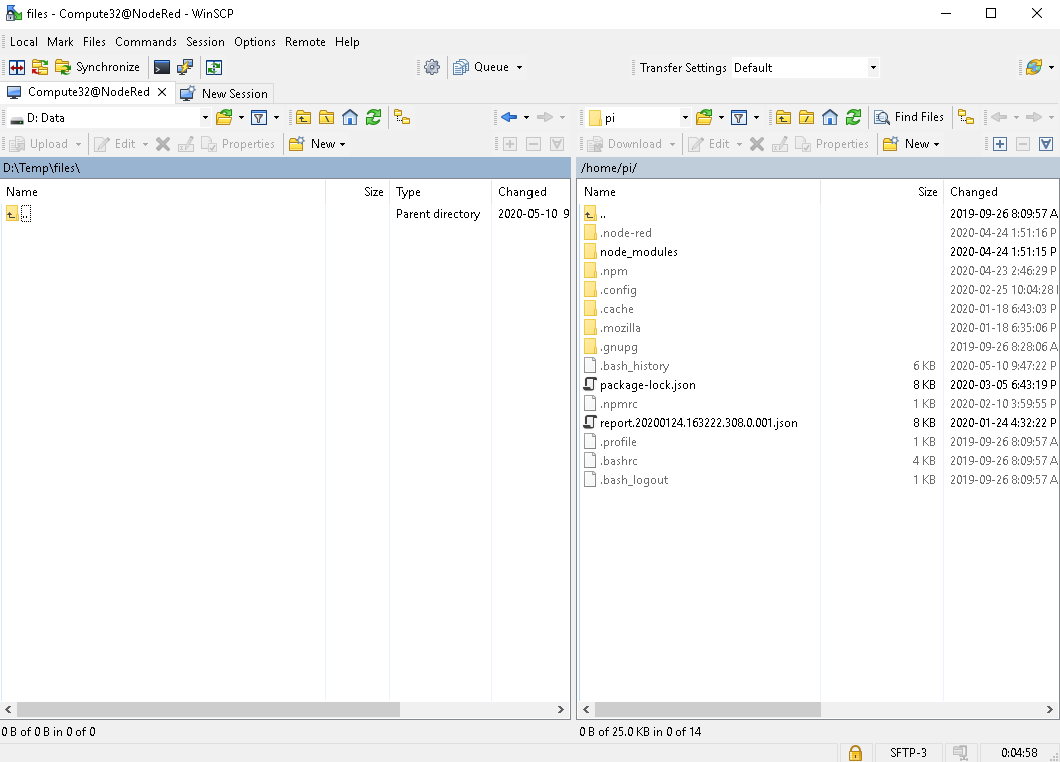
Once connected you will see something similar to the following, on the left is your local computer and on the right is the remote system - the ‘home’ directory on the Compute Module.
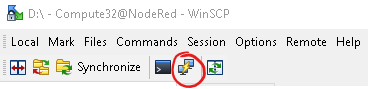
Next to connect via Putty - click on the Putty icon in the WinSCP menu - circled below;
This will launch Putty and log into the Compute Module - you should get a Command Prompt like this;

If you want to change the default password, type passwd and hit enter, then enter the default password - raspberry - and then you need to enter the new password twice and it will be changed - remember after going back to WinSCP if you saved the password you will need to re-enter the new one.
Next you should run Raspi-config by entering
sudo raspi-config
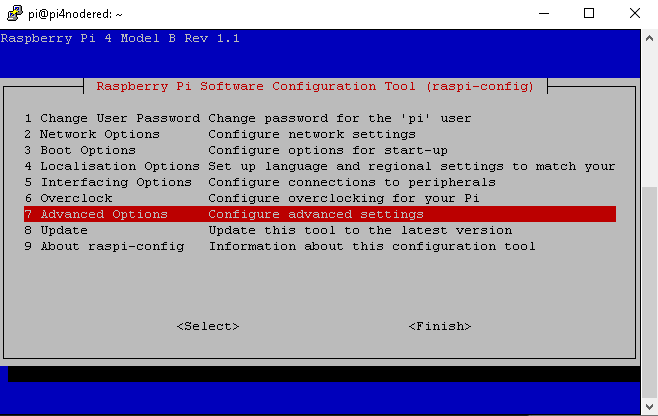
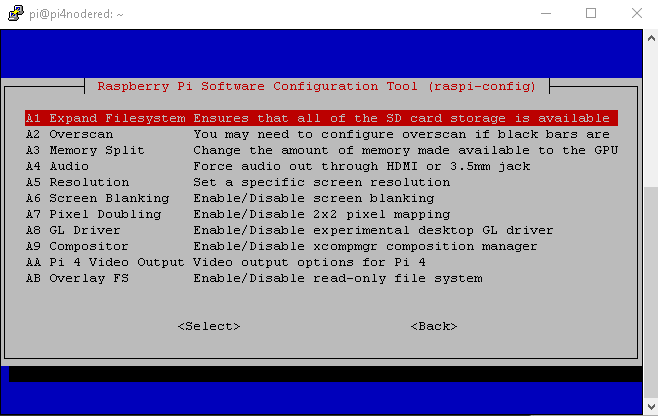
Navigate to Advanced options, the first option is already highlighted - ‘Expand Filesystem’ - press enter.
It will ask for confirmation, after it is done use the ‘Tab’ key to navigate to ‘Back’, and then again to ‘Finish’ - it will ask to reboot and during the reboot it will expand the file system to use the full size of the Compute Module memory. This step is necessary because the image file has been compressed to save save and reduce the time it takes to download.
It’s sometimes necessary to connect remotely to stop the node red service so that updates can be done. The Node-red service is configured to run automatically on start-up, to stop it inter the following command;
node-red-stop
and to restart it;
node-red-start
That completes this tutorial - in the next I will show how to update the Node-red flow to run a newer version of the Home Automation GUI.