Here is an example of a single stage heating system for the Tstat8
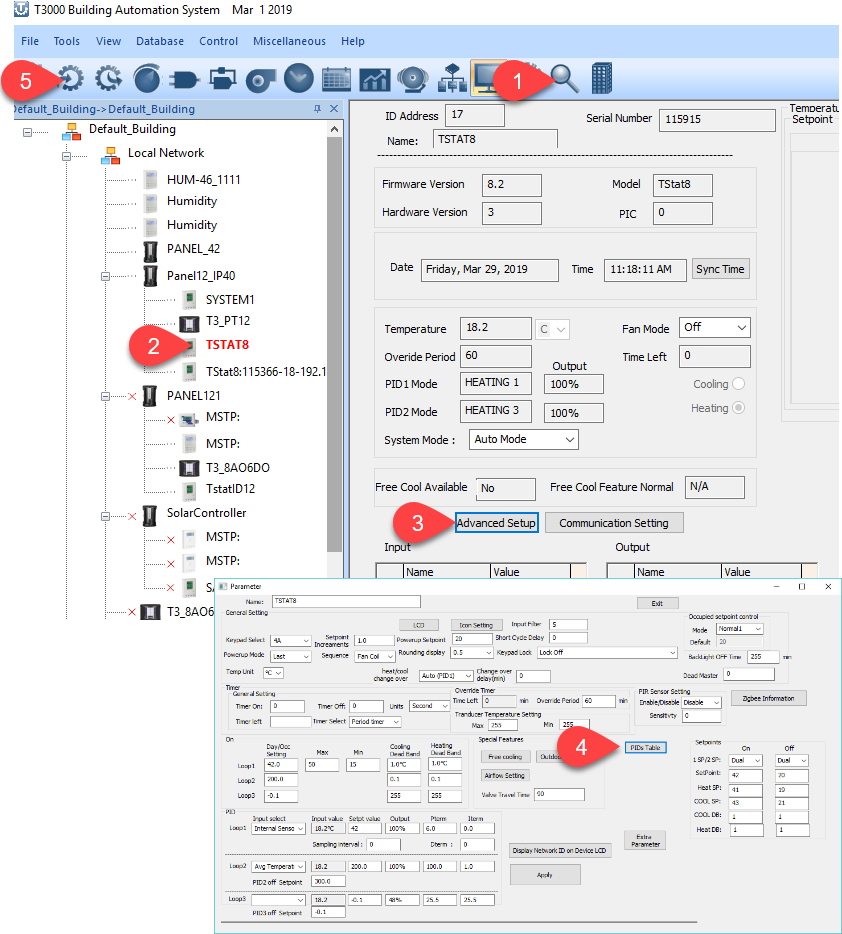
First as usual, download the T3000 Software and hit the magnifying glass icon to discover devices. This will pick up any of the Temco products no matter the protocol, media or baud rate.
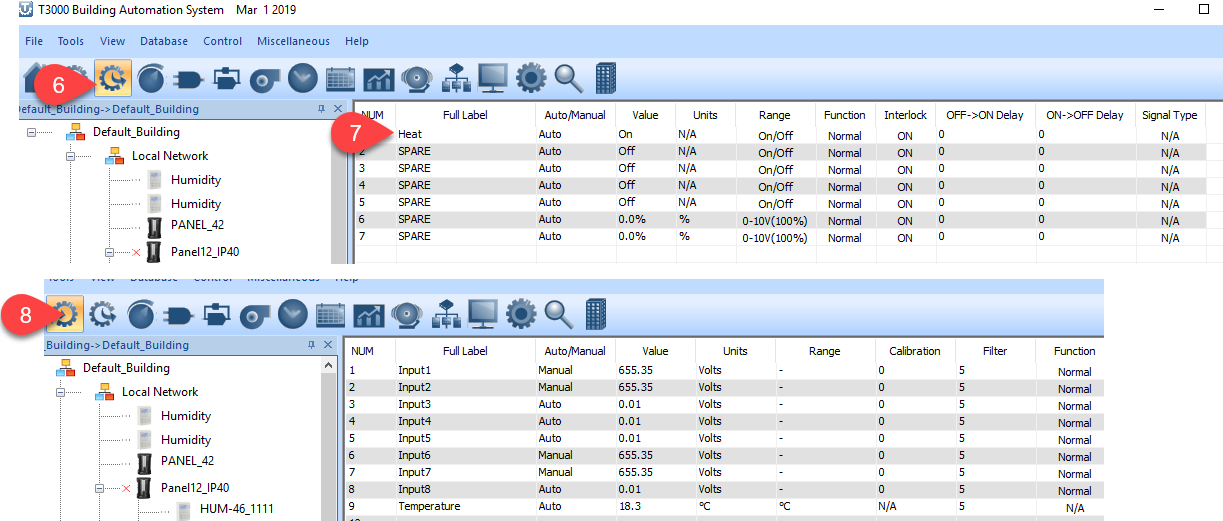
The device will show up in the tree on the left, click on the Tstat8 and then click on the outputs icon at Tab 6 to fill in the heat output at Tab7. You can use any output for any function, heating or cooling and in this example we just pick the first relay as the heating output. Similarly you can fill in some inputs if you are tying in some external sensors by typing in the range and name, etc on the inputs table at Tab8.
Next head back to the advanced srceen at Tab3 , then go through to the PID Table at Tab4.
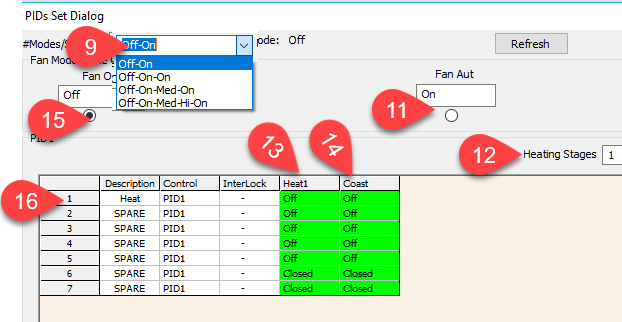
…which brings up the ‘PID’ staging table where you define how many stages of heating or cooling and the number of ‘modes’. First, the easy part is to fill in how many stages of heating and cooling at Tab12, in this case heat=1 and cool = 0. Next set the number of modes at Tab9, in our case I have selectedthe first item which means we have two modes. Your view may differ a little because these names can be edited at Tab11 and 15, in this example I have called the two modes Off and On.
Now we set up which outputs will be active for each of the possible states. At Tab16 is the row for output1, each row represents one of the outputs and the columns at Tabs 13 and 14 represent the stages of heating and coasting respectively. Currently we have the radio button at Tab15 selected so we’re setting the heat to be off for both stages.
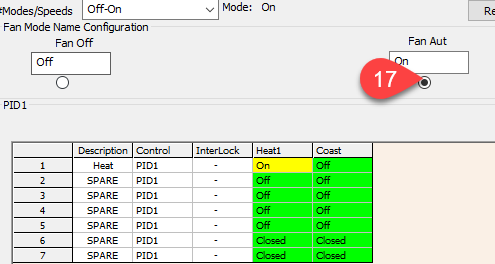
Next we click on the On radio button at Tab17 and configure the ‘On’ table, set the Heat to be on for Heating Stage1 at the yellow box. All the rest of the outputs are Off in all modes and stages as shown by the green boxes.
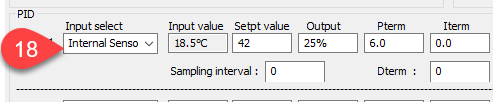
Next we set up the PID loop which you can find in the advanced dialog and showing below at Tab18. Most of the time you can leave the defaults for all these settings where they are but here’s the discussion for those who need to use them.
The first parameter to set up is to pick which sensor will provide the feedback, this example just uses the internal temperature sensor of the Tstat8 but you can use any of the external inputs or an average of several sensors. The Pterm is set to 6 which means we’ll get a full heating or cooling response when the temperature reaches 6 degrees off of the setpoint. A smaller number for the Pterm means the system will respond hyper-actively to small deviations from setpoint and a larger Pterm will be less active. Big Pterm = Lazy PID.
It is suggested to debug your system with a Pterm only to get started, once you are satisfied with the staging you can add some I term which acts as an accumulator of the deviation from setpoint, over time the I term will kick the system in the pants so to speak, if there’s a small deviation from setpoint over a long period the next stage of heating or cooling will come on due to the Iterm. The larger the I term the more action it will contribute: Big I term = Hyper-Active PID.
Finally, the Derivative D term, this can be useful on a system with over sized equipment and a fast response time, usually it will be left at zero but feel free to add a little D term if the system is oscillating.
Final Note: If your system is in DegF then the Pterm will be roughly double of the DegC settings shown above. In the case of an office room heater application, you might go with 3DegF for the Pterm which means when the room is 3Deg below setpoint the heat will come on. In the case of a hot water heater you can reduce cycling by accepting a larger deviation of say 6DegF for the Pterm.
Final Note2: If you’re accustomed to setting the exact on and off trigger points you can do that by setting the I term to zero but you can improve performance by introducing some I term. This will make your system more responsive to small deviations over time however the exact on and off trigger points will shift over time depending on the accumulated error.