A recent email asks how to configure the inputs of a T3 controller and see them over Bacnet:
We have purchased 5 pieces BacNet programmable controllers T3BB but these controllers are new for our company. Our company works for Industrial Automation and control and we know the other brand PLC and programmable controllers but T3000 is first for our company. Can you please make one sample program for 3 digital input and 3 analog input (4-20ma 0–100 scale) and to show these 6 inputs data in SCADA BacNet computer through BacNet IP (internet). Digital input will require ON/OFF status while analog inputs will require to show the scaled reading.
While replying I figured I may as well make a detailed example for others to follow along with. The first order of business is to connect to the T3 controller using our free T3000 front end software which you can download from here. For the physical connection to the controller you can do that over Ethernet by either direct cable connection or through a hub. Click the scan icon at Tab1 to discover the device and then select the Inputs table at Tab2. You can give each input a name and label at Tab3.
In this example we’re setting up 4-20ma transducers so set the signal type ‘jumper’ at Tab6. The default is ‘thermistor/dry contact’, change it to 4-20ma.
Next set the range by clicking at tab4 which brings up the range setting dialog at Tab5 where you select from 50 predefined ranges or you can create your own custom ranges.
For analog custom ranges set these up at Tab7 which brings up the custom analog dialog shown below. At Tab8 you set the number of points to define the lookup table, for a typical linear transducer that will be just two points for the min and max values which you enter at Tab9. Since this is a 4 to 20ma sensor then you’ll enter the pressure at 4ma and at 20ma as shown. Type in the engineering units up at Tab10.
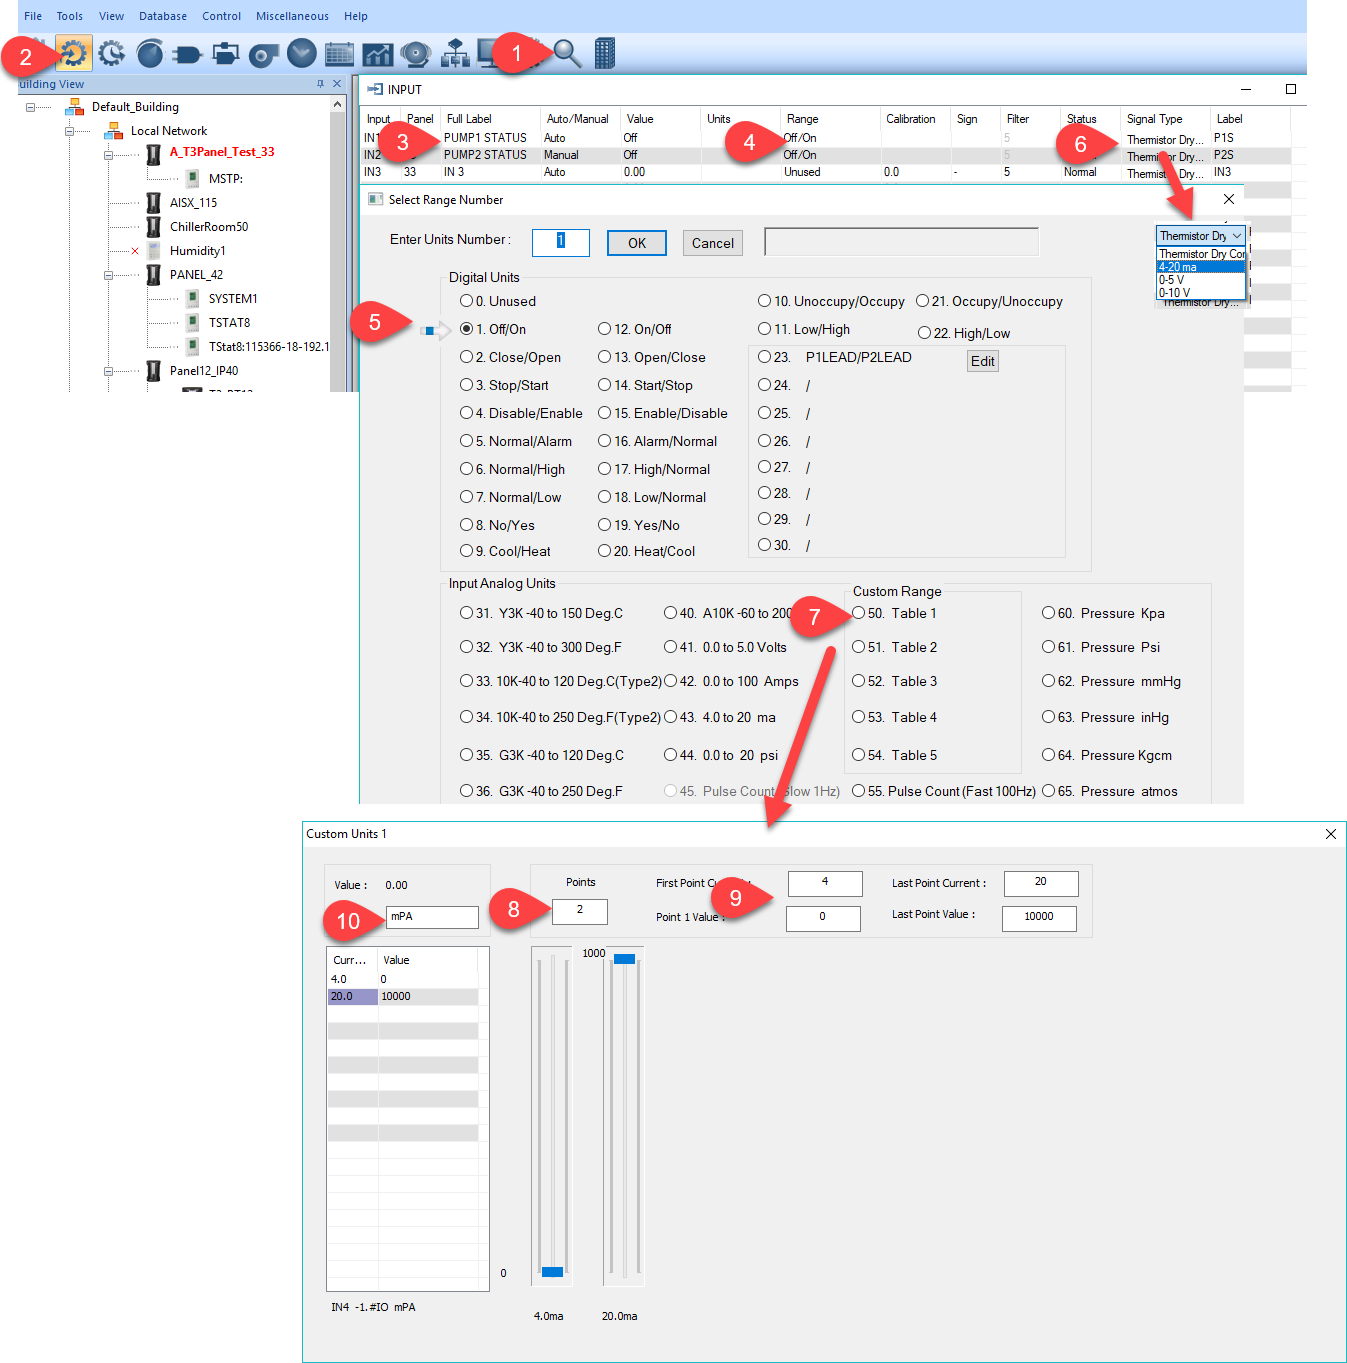
Here’s the 6 inputs set up as described in the email. Notice at Tab11 that all the sensors can borrow the same custom Table1, you only need to define the lookup table once and can then apply the same table to other sensors.

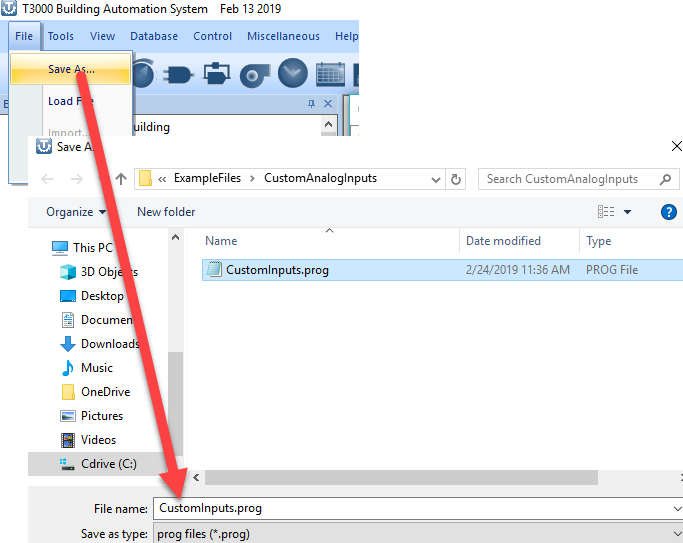
Once you have finished entering all the inputs and outputs for your application it’s a good time to save the work, do that from the T3000-> file save menu item. The data you entered is now saved in a *.prog file for backup or loading to other controllers. The file for this (simple) example is included in the zip file of all examples whcih can be downloaded from this link.
And here is a link for the CustomInputs.prog on its own:
CustomInputs.prog (64.5 KB)
And one final note, the configuration of inputs and most of the details mentioned her e are actually covered in the online help which you can access from T3000 using the F1 function key. Here’s a view of the help system for setting up custom analog ranges.
