Here are a few tips on how to use the new Home Automation GUI I have created, this is still a work in progress, and will likely be changing a lot as more people test and give feedback on it.
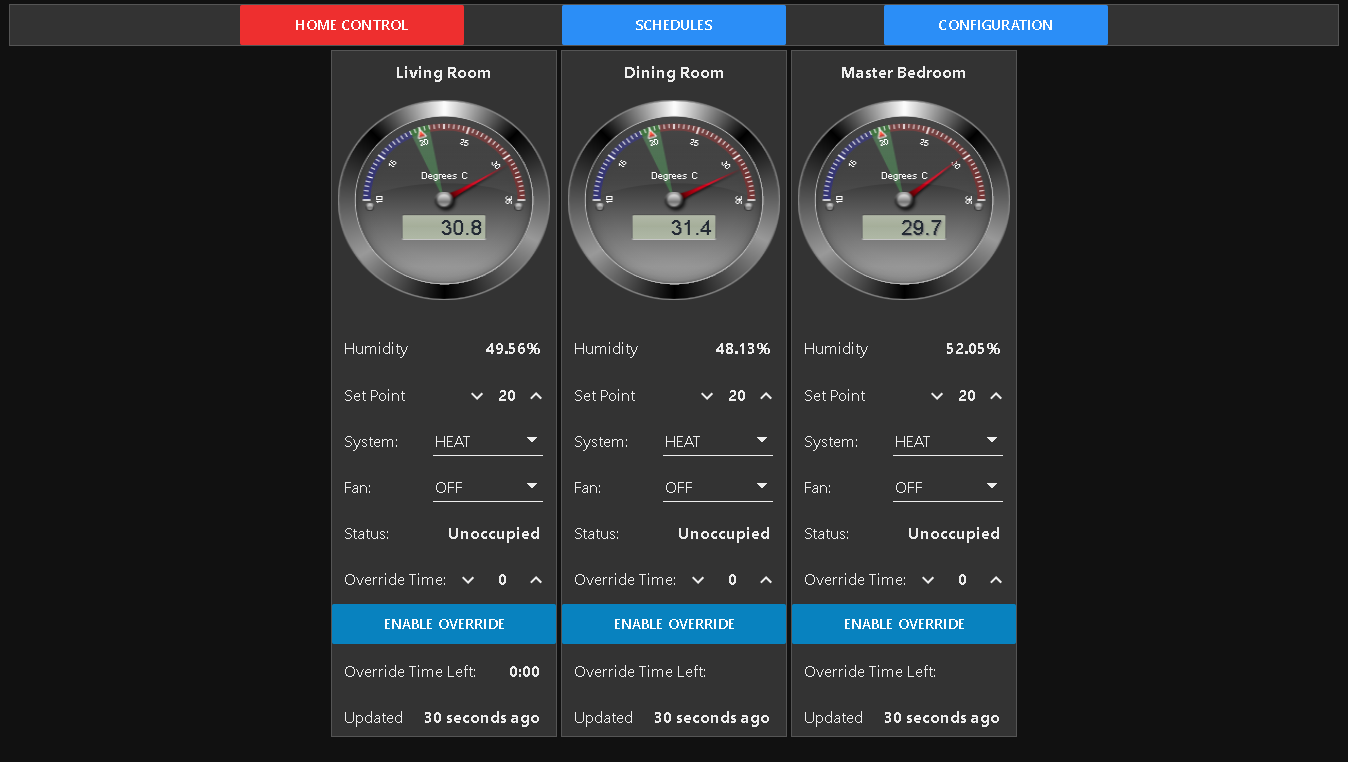
First is the Main interface where setpoints, mode, fan control, and overrides can be controlled, and also the current temperature and any other installed sensors will display their current readings. This page is pretty self-explanatory - here you can change the current mode (Heat/Cool/Auto), fan mode (On/Off/Auto), and enable override to turn the system on if it is in ‘Unoccupied’ mode. It will display as many rooms as are configured for the system - which is set up in the Configuration tab explained in further detail below.
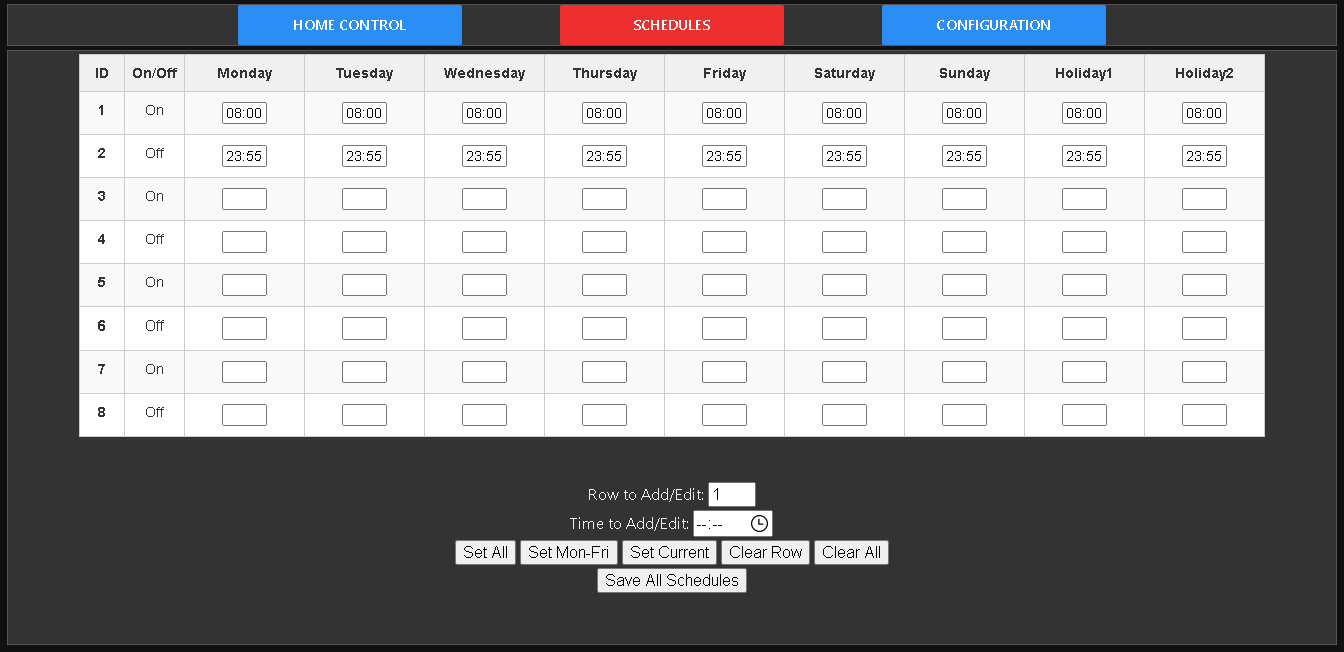
The Schedules allow for up to 4 different On/Off events per day - with the ability to change these for 2 different sets of ‘Holidays’. Due to limitations with the abilities of the system used for this UI, and to allow for proper validation of the entries - the actual times in the schedule table are not directly editable. Also due to a bug I am having with it - if you want to edit the schedule it is best to start by clicking on ‘Clear All’ first and then creating a new schedule. I hope to overcome this problem soon so it’s easier to edit an existing schedule without having to start from scratch, but as I said - it’s a work in progress at this point - as we get more people testing and giving feedback it will be evolving and should be more user friendly as I work out these bugs and the interface matures.
In order to create or modify a schedule, start by clicking on ‘Clear Schedule’, then select a time where is says ‘Time to Add/Edit’, and then click on either ‘Set All’ - ‘Set Mon-Fri’ - or if you want to set an individual day time - click on ‘Set Current’. Once you have created your schedule and want to save it - click on ‘Save All Schedules’ - you will be prompted that they have been saved, occasionally if there is currently too much network traffic this may fail and you won’t receive a ‘Success’ notice - so you should click ‘Save All Schedules’ again - we will be implementing error checking soon so this won’t be necessary.
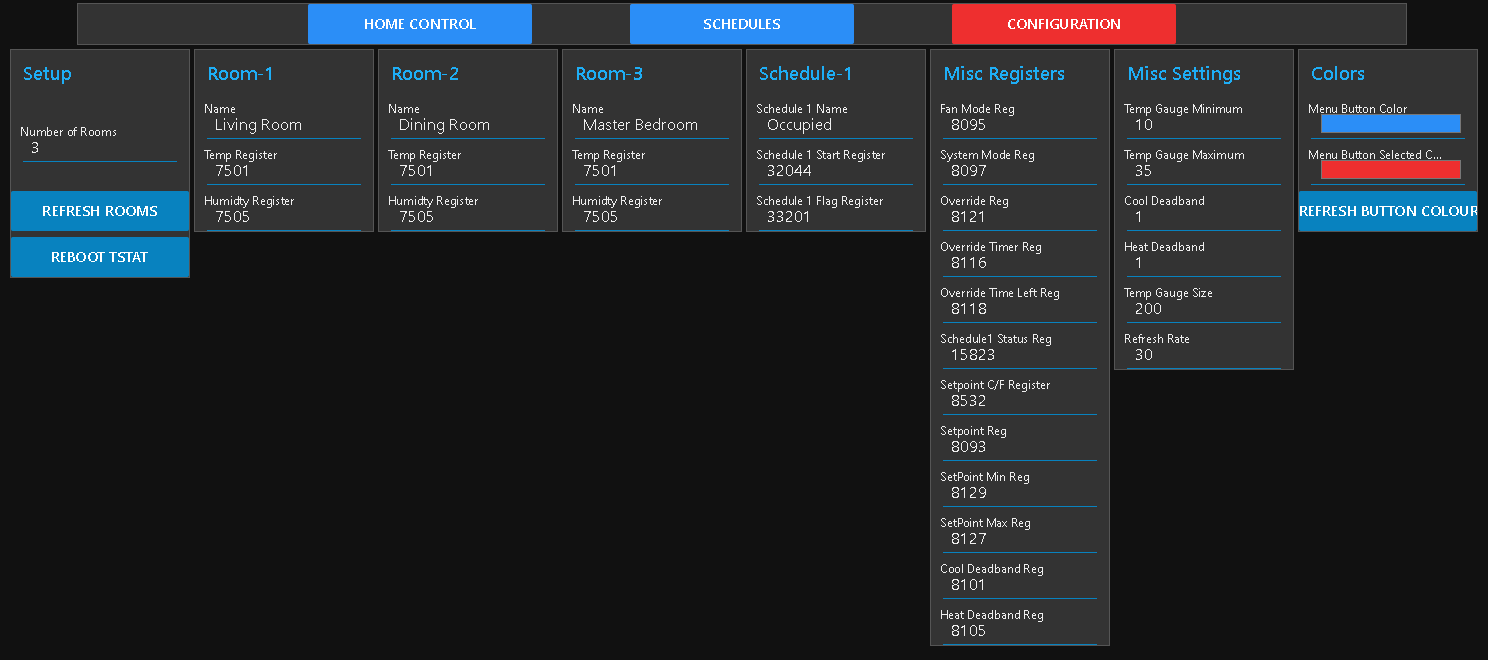
And finally is the ‘Configuration Tab’ - here the number of rooms can be configured - if changed the ‘Refresh Rooms’ should be clicked to apply this change. The name for each room can be changed, and the Temperature and other registers can be changed. There are also settings for what temperatures are shown for min/max values on the gauges for the main 'Home Control" tab, deadbands (heat/cool is initiated when read value differs from existing temperature + or - deadband). There is also another setting for the ‘Gauge size’ - I will be creating a separate tutorial on adjusting the sizes of the GUI for specific screen sizes. The ‘Refresh Rate’ is the number of seconds between temperature refresh on the main ‘Home Control’ GUI. The colors for the buttons that are displayed can also be changed here.