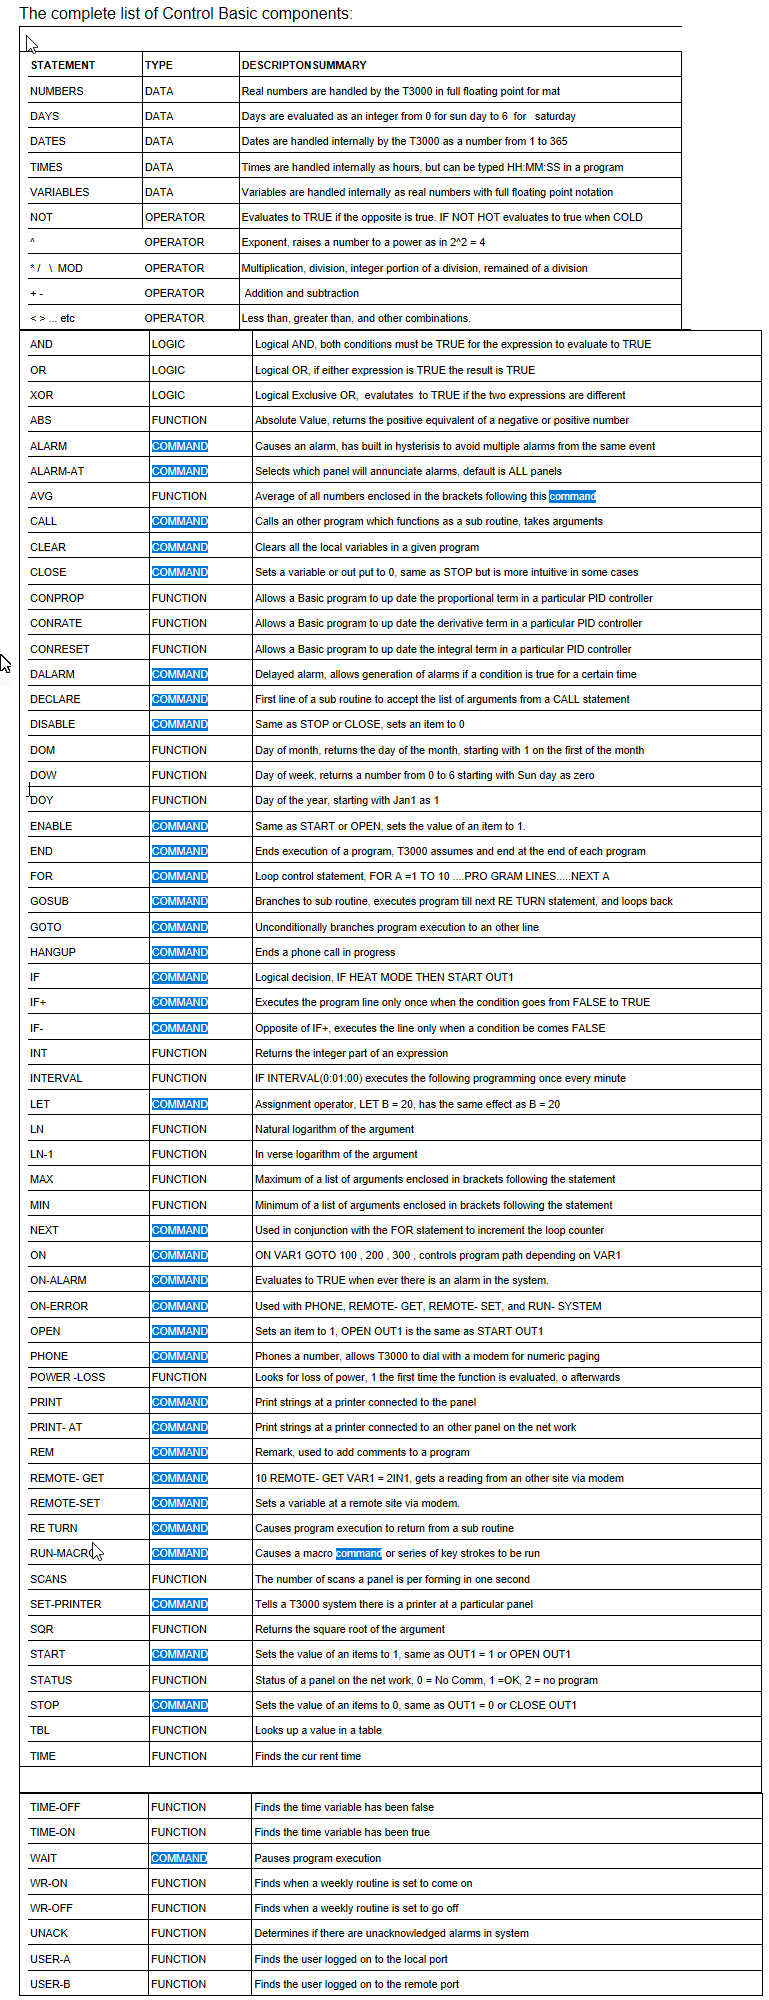
I received an email today asking help to debug a simple program, thought I may as well post it here for others to learn from. This is the most basic beginning program, when a switch flips on and off, the output will follow it. Here is the program our client worked out, seems simple enough and should be working.
10 REM *** CONTROLS ****
20 REM ***
30 REM ***
40 IF IN7 = 0 THEN DISABLE OUT1
50 IF IN7 = 1 THEN ENABLE OUT1
60 GOTO 10
The line 60 to restart the program is actually redundant, the system will automatically start the program at line 10 after each run through the logic, so we can take this line out and we’re left with this which should work:
10 REM *** CONTROLS ****
20 REM ***
30 REM ***
40 IF IN7 = 0 THEN DISABLE OUT1
50 IF IN7 = 1 THEN ENABLE OUT1
I entered the program, I wanted to confirm because I don’t use the ENABLE and DISABLE commands myself but it does indeed work.
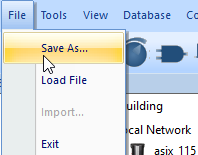
Tip: When you have programming issues you would like to discuss with us you can do a File → Save As from the T3000 software and email us the resulting *.prog file.
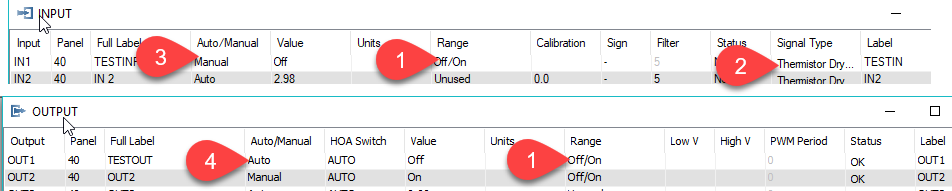
Since I don’t have the full prog file I follow up now with a few things you can do to debug. First check that the input and output range settings are configured, at tab1 the range should be set to OFF/ON for both input and output. The signal type at Tab2 for the input should be left at the default which is thermister/dry contact. If you are not using dry contacts then you can experiment with the other signal types but for your first project, simpler is better so a switch wired to input1 and the signal type configured as shown is best.
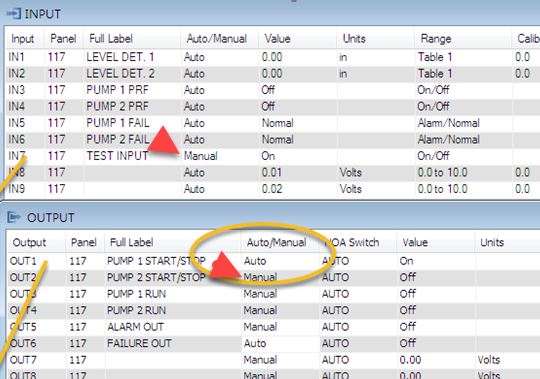
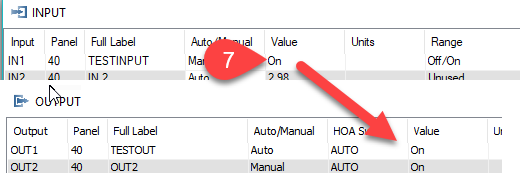
The Auto/Manual setting at Tabs 3 and Tab4 are for manually overriding i/o points during testing & override situations. These should be left auto for both the input and the output points. I have the input in Manual mode here for debugging the program without having a switch wired to my controller. A little to the right of Tab4 is the hardware switch, the Hand-Off-Auto switch on the front cover of the controller, this must be set to Auto.
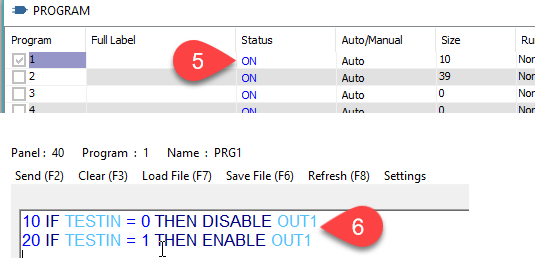
Here is a view of the programs table, your program has an auto/manual override which should also be in Auto and ON status here at Tab5 otherwise the program will not be running. Programs further down can be turned off so that they don’t interfere with your debugging. I have entered in a shorthand version of the clients program at Tab6 and its working correctly, when I toggle the input on & off the output follows.
If I had an actual switch wired to the input I would leave the input in Auto and flip the hardware switch instead.
For extra points you can try an even simpler program, this accomplishes the same thing:
10 OUT1 = IN1
And here’s another simple program you may find useful during commissioning:
10 IF TIME-ON( OUT1 ) > 0:0:10 THEN STOP OUT1
10 IF TIME-OFF( OUT1 ) > 0:0:10 THEN START OUT1
This will turn the output on and off every 10 seconds, you can experiment by adding logic and delays, overrides and so on. It is easy to build up a complex sequence of operations with a handful of programming lines.