The Tstat8 has a feature for heating or cooling using a pulse width modulating output. This can be useful for applications like floor heating, heat chambers, thermoelectric modules and thermal acting valves, anywhere you have an on-off action to enable heating or cooling which can be cycled quickly to act like a modulating source. This allows for smooth control around the setpoint without the large swings normally associated with an on-off source. This strategy would not be useful for a compressor since the output will be cycling a lot but its well suited to electric heat using a solid state relay for example.
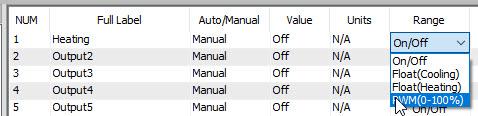
First connect to the Tstat and configure one of the outputs with the PWM range setting.
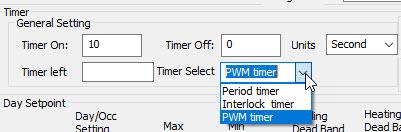
Next click the gear icon to bring up the advanced settings, then edit the timer settings as shown. The time-on setting is the time base, setting this to 10 seconds means the period of the PWM will be 10 seconds, when the action is at 20% the output will be on for 2 seconds and off for 8 seconds. The timer can be used for other functions in the stat and has to be assigned to the PWM function for this feature to work, do that in the Timer Select dropdown.
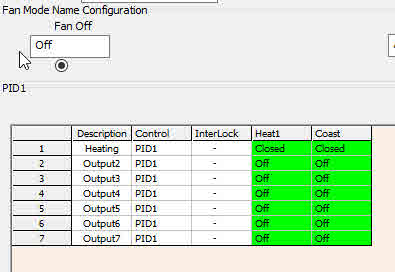
Next setup the output ‘PID sequencing’ table by again going to the advanced dialog, select the PID table at tab3, set the number of modes to two (auto and off modes) at tab4, set the number of heating stages to 1 and cooling to zero at tab6. Make sure the Auto radio button is selected at tab5, the grid below represents the staging of the outputs during the coasting and heating stages. The column at tab8 represents the state of the outputs during heating stage1. The column at tab9 represents the outputs during the coasting condition, here all outputs are off when coasting.
The rows represent the outputs of the stat, at tab10 is output 1, the heating output. There is only one stage of heating in this example, stage1 heating (column at tab8) is set to modulare from 0 to 100% during first stage heat. In the coasting column (tab9) the output 1 is off.
All other outputs are off for all stages in this example though we could add outputs like fans and pumps on the other outputs if the application calls for it.
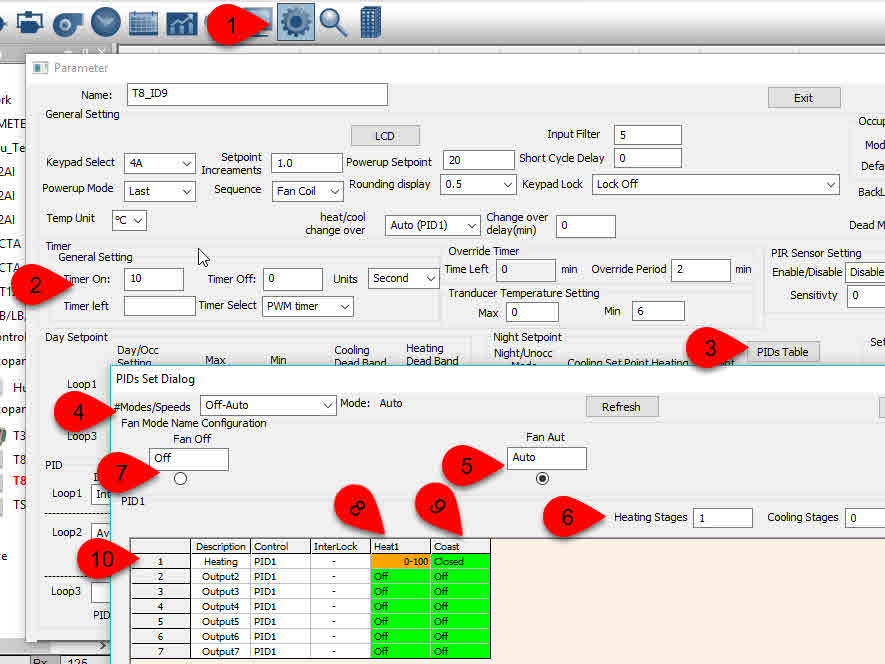
Click the OFF mode radio button at tab7 and set everything in the output grid to off for all outputs in all modes to keep the example simple. In order to maintain night setpoints in the unoccupied (OFF) mode you will normally copy the same settings as you configured in the Auto table, Tab5.